I'm afraid that I still haven't got to grips with manual settings on my camera and rarely stray from the automatic setting.
Even if I could get my head round which settings to choose there are times when I need to take a photo very quickly and, if I had to fiddle with settings, the moment would be lost.
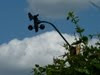
One example was when a robin was singing high in a tree . The late afternoon sun was shining and the bird was just a silhouette. No point even trying to take a photo with my lack of expertise? Digital photography means there is never anything to lose by just pointing the camera and pressing the shutter.
The resulting image was this ...

Rubbish isn't it? The camera, however has captured far more than it first appears and all is not lost.
We have a piece of software called Adobe Lightroom which often compensates for my lack of expertise in setting up the camera correctly. Using this I can apply settings after the image has been taken.
Cheating I hear some of you muttering but my aim is to produce a pleasing image and why is it cheating to tweak settings after the photo was taken rather than before. If the initial photo is really rubbish then the software won't magically turn it into a perfect photo. The information has to be incorporated when taking the image in order for the software to bring it out.
Cheating I hear some of you muttering but my aim is to produce a pleasing image and why is it cheating to tweak settings after the photo was taken rather than before. If the initial photo is really rubbish then the software won't magically turn it into a perfect photo. The information has to be incorporated when taking the image in order for the software to bring it out.
I've chosen this extreme example to show what is possible. The photo above was actually what I saw with the naked eye.
I'm not going into tutorial mode - the idea is just to give a flavour of how something half decent can be produced from what initially appears to be a completely failed photo.
I imported the original image into Lightroom.

Let's look closer at part of the panel on the right.

This area allows you to correct the exposure and alter various other light settings. All I needed to do to this photo was to decrease the amount of shadow. I reduced it to the maximum capacity as you can see from the slider above.
I ended up with this ...

The details of the robin were magically revealed. The camera had caught all this bit the shadowing masked it.


I set the crop box around the part of the image that I wanted to keep.

If you look closely you can see that the highlighted selection has some guidelines displayed. I have this set up in thirds, like a noughts and crossed template. I'm not going into any detail about the rule of thirds here other than to say that the guides help with composition. The selection can be moved around until you are happy with the composition. I wanted the viewer to be drawn to the robin's eye and so this was placed at the point where a horizontal and vertical line cross.

It's not as sharp as it could be but considering how it set off I don't think it is bad. It was good enough to use as the design for my 2016 Christmas cards.






 Posts
Posts